Buscar este blog

miércoles, 30 de diciembre de 2015

Log4j 1.x - Custom ThrowableRenderer

With log4j 1.x you can customize the format of your message logs with EnhancedPatternLayout,
There is a special Conversion Character to customize exception traces called throwable. But if you need more control about how to print exceptions you can hook your own renderer.

Create a class which implements org.apache.log4j.spi.ThrowableRenderer.
package es.cixtec.complexarchetype.web.log4j;

import org.apache.log4j.spi.ThrowableRenderer;

public class MyCustomThrowableRenderer implements ThrowableRenderer {

    @Override
    public String[] doRender(final Throwable t) {
        // do something with t
        return new String[] { "This", "is", "a", "custom", "trace" };
    }
}

Then, in log4j.xml, you need to link this class by using the throwableRenderer tag.
<?xml version="1.0" encoding="UTF-8" ?>
<!DOCTYPE log4j:configuration SYSTEM "log4j.dtd">
<log4j:configuration debug="true"  xmlns:log4j='http://jakarta.apache.org/log4j/'>
    
    <throwableRenderer class="es.sisifo.test.web.log4j.MyCustomThrowableRenderer"/>
    
    <appender name="CONSOLE" class="org.apache.log4j.ConsoleAppender">
        <layout class="org.apache.log4j.EnhancedPatternLayout">
        <param name="ConversionPattern" 
          value="%d{yyyy-MM-dd HH:mm:ss} %-5p %c{1}:%L - %m%n" />
        </layout>
    </appender>
    
    <appender name="LOG" class="org.apache.log4j.DailyRollingFileAppender">
        <param name="File" value="${jboss.server.log.dir}/test-web.log" />
        <param name="DatePattern" value="'.'yyyy-MM-dd"/>
        <layout class="org.apache.log4j.EnhancedPatternLayout">
            <param name="ConversionPattern" value="[%-5p][%d{ISO8601}][%-4L] %F>%m%n" />
        </layout>
    </appender>
    

    <root>
        <level value="DEBUG" />
        <appender-ref ref="CONSOLE" />
        <appender-ref ref="LOG" />
    </root>

</log4j:configuration>

As result, when a exception is logged you get something like this.
LOGGER.error("Exceptions happens", new NullPointerException());

[ERROR][2015-12-30 11:33:09,003][45  ] GridServiceImpl.java>Exceptions happens
This
is
a
custom
trace

lunes, 28 de diciembre de 2015

JBoss - Useful system properties

This post is a recollection of some magic system properties to tweak JBoss. Some of them were found by our development team while others where found by our customer.
These were tested with JBoss EAP 6.2 and JBoss EAP 6.4.

Some of these properties can be found in the following page: https://docs.jboss.org/jbossweb/7.0.x/sysprops.html. Others are more hidden.

In domain mode, you can add a system property to a server with the following command:
[domain@localhost:9999 /] /host=hostController01/server-config=serv-one/system-property=popertyName:add(value=propertyValue)

Clear JSP cache on context destroy

Used in order to force JBoss to clean all .jsp an .class files during an application redeploy.

Key: DELETE_WORK_DIR_ONCONTEXTDESTROY
Value: true


Set server bind addres

Used in order to set a specific IP to a server when the host machine has multiple network interfaces.

Key 1: jboss.bind.address
Value: any valid address

Key 2: jboss.bind.address.unsecure
Value: any valid address

With these properties, in domain mode, you can multiple servers with different IPs address in the same machine.


Configure default request encoding

Used in order to send data encoded in a particular charset to the server.

Key 1: org.apache.catalina.connector.URI_ENCODING 
value: UTF-8

Key 2: org.apache.catalina.connector.USE_BODY_ENCODING_FOR_QUERY_STRING 
value: true


Configure maximun POST parammeter

Used in order to allow the browser to send a POST with a huge number of parameters, i.e, to submit a form with a lot of fields.

Key: org.apache.tomcat.util.http.Parameters.MAX_COUNT
value: a big number

CentOS SMB windows share

The purpose of this post is to show how to configure a shared directory between windows and UNIX.

In windows side

You need set a directory as shared.
Optionally you can add some users who will be allowed to acces to this directory. Keep in mind that de owner (the user who created the dir is also allowed to access).

For example, the user winuser with pass winpass share the folder winshare. The windows PC IP is 192.168.1.133.

In unix side

Install the following packages:
[root@host]# yum install samba-client samba-common cifs-utils

Create the associated dir in mount directory:
[root@host]# mkdir /mnt/winshareInUnix

In order to mount the dir you have two options:
Option 1 - Auto mount on startup:
You have to edit the /etc/fstab file and append the following line:
[root@host]# //192.168.1.133/winshare /mnt/winshareInUnix cifs user,uid=500,gid=500,rw,suid,username=winuser,password=winpass 0 0

Option 2 - Manual mount
[root@host]# mount -t cifs //192.168.1.133/winshare /mnt/winshareInUnix-o username=winuser,password=winpass ,sec=ntlm
(...)
[root@10 mnt]# umount /mnt/winshareInUnix

sábado, 26 de diciembre de 2015

Java - Web based protocol handler with Inno Setup

This is the second post about how to build and launch a desktop app from a web app, i.e, from a browser.

In the previous post (http://trabajosdesisifo.blogspot.com.es/2015/12/java-bundle-jre-inside-executable-file.html) I built and packed up a desktop java app. Now I want to be able to invoke this app, wich is running in the user PC, from the browser. In order to do that you need to create a custom protocol handler and register it in the user PC.

With a protocol invocation a browser can launch a user app. A very common example of this type of invocation is "mailto:". Just like when you click a link which points to "http:xxxx" the browser calls himself, when you click a link  which points to "mailto:mymail@gmail.com" the browser call the user app associated with the mailto protocol.

The magic with this type of invocations happens in the windows registry. There must be an entry in the registry that associates the protocol name with some local app. In this way, when the browser requested for this protocol, windows check its registry, reads the path to the local app, and calls it with the appropriate params.


I have installed Outlook as my default mail app, so the value of the key containing the app path is "C:\PROGRA~2\MICROS~1\Office12\OUTLOOK.EXE" -c IPM.Note /m "%1". 

If I type the following command in a DOS window I will call my Outlook to send a message to someDir@gmail.com:
"C:\PROGRA~2\MICROS~1\Office12\OUTLOOK.EXE" -c IPM.Note /m "someDir@gmail.com"

You can check in the Microsoft doc, https://msdn.microsoft.com/en-us/library/aa767914(v=vs.85).aspx, what this registry entries means.


So, back to my desktop app, what I´m going to do is to register custom protocol called "desktop01:". This will be done during the installation of the own application, so I need to modify the installer script to tweak the registry.

Step 4, modify Inno Setup script

Inno Setup is like a compiler, you start with a code file (.java or, in this case .iss) and in the end you get the compilation (.class or in this case a .exe). In the Step 3 of this serie of post, I created the script file by using the graphical wizard, but the result was a .iss file like this one.

Desktop.iss
; Script generated by the Inno Setup Script Wizard.
; SEE THE DOCUMENTATION FOR DETAILS ON CREATING INNO SETUP SCRIPT FILES!

#define MyAppName "DesktopApp"
#define MyAppVersion "1.0.0"
#define MyAppPublisher "Sisifo INC"
#define MyAppURL "http://trabajosdesisifo.blogspot.com.es/"
#define MyAppExeName "desktopApp.exe"

[Setup]
; NOTE: The value of AppId uniquely identifies this application.
; Do not use the same AppId value in installers for other applications.
; (To generate a new GUID, click Tools | Generate GUID inside the IDE.)
AppId={{732AE723-F81E-4F76-A792-F94CC358F9C6}
AppName={#MyAppName}
AppVersion={#MyAppVersion}
;AppVerName={#MyAppName} {#MyAppVersion}
AppPublisher={#MyAppPublisher}
AppPublisherURL={#MyAppURL}
AppSupportURL={#MyAppURL}
AppUpdatesURL={#MyAppURL}
DefaultDirName={pf}\{#MyAppName}
DefaultGroupName={#MyAppName}
OutputBaseFilename=setup
Compression=lzma
SolidCompression=yes

[Languages]
Name: "english"; MessagesFile: "compiler:Default.isl"
Name: "spanish"; MessagesFile: "compiler:Languages\Spanish.isl"

[Tasks]
Name: "desktopicon"; Description: "{cm:CreateDesktopIcon}"; GroupDescription: "{cm:AdditionalIcons}"; Flags: unchecked

[Files]
Source: "E:\desktopApp\desktopApp.exe"; DestDir: "{app}"; Flags: ignoreversion
Source: "E:\desktopApp\resources\*"; DestDir: "{app}"; Flags: ignoreversion recursesubdirs createallsubdirs
; NOTE: Don't use "Flags: ignoreversion" on any shared system files

[Icons]
Name: "{group}\{#MyAppName}"; Filename: "{app}\{#MyAppExeName}"
Name: "{commondesktop}\{#MyAppName}"; Filename: "{app}\{#MyAppExeName}"; Tasks: desktopicon

[Run]
Filename: "{app}\{#MyAppExeName}"; Description: "{cm:LaunchProgram,{#StringChange(MyAppName, '&', '&&')}}"; Flags: nowait postinstall skipifsilent


As you can see, the script is divided in sections marked with the "[xxxx]". This is what really tells Inno Setup how to build the installer.

I want to register a custom protocol called "desktop01:", so according with MS doc, you need to create the following registry entries:

HKEY_CLASSES_ROOT
   desktop01
      (Default) = "URL:My custom protocol handler 01"
      URL Protocol = ""
      DefaultIcon
         (Default) = "desktopApp.exe,1"
      shell
         open
            command
               (Default) = "C:\Archivos de programa\DesktopApp\desktopApp.exe" "%1"

Some of the values are variables you can obtain from Inno Setup in runtime, so the final path will depend on the user election.

To translate this registry entries into the Inno Setup script, you have to added the following lines in this file.
[Registry]
Root: HKCR; Subkey: "desktop01"; Flags: uninsdeletekey
Root: HKCR; Subkey: "desktop01"; ValueType: string; ValueName: ""; ValueData: "URL:My custom protocol handler 01"; Flags: uninsdeletekey
Root: HKCR; Subkey: "desktop01"; ValueType: string; ValueName: "URL Protocol"; ValueData: ""; Flags: uninsdeletekey
Root: HKCR; Subkey: "desktop01\DefaultIcon"; Flags: uninsdeletekey
Root: HKCR; Subkey: "desktop01\DefaultIcon"; ValueType: string; ValueName: ""; ValueData: "{#MyAppExeName},1"; Flags: uninsdeletekey
Root: HKCR; Subkey: "desktop01\Shell\open\command"; Flags: uninsdeletekey
Root: HKCR; Subkey: "desktop01\Shell\open\command"; ValueType: string; ValueName: ""; ValueData: """{app}\{#MyAppExeName}"" ""%1"""; Flags: uninsdeletekey

The complete doc about how to manage registry with Inno Setup can be found in its offical doc, http://www.jrsoftware.org/ishelp/index.php?topic=registrysection.

Then you need to rebuild the installer.

When you reinstall the app, and check the registry, you will found the new entries.


To test the app, I create the following simple HTML:
<html>

<body> 
 <a href="desktop01:myCustomArgument">Launch App</a> 
</script>

</body>
</html>

When you click in the link, the browser will show a warning to confirm the launch of the desktop app.


This solution supports only one argument, but you can pass multiple parameters in a query string - like fashion, just like in a URL.

Java - Bundle JRE inside executable file - Launch4j and Inno Setup

This is the first of a serie of two posts about how to launch a desktop java application from a web browser. In this case I´ll work in a desktop app because it has to be able to access local resources in the user PC (for example, applets could do this, but they are far deprecated).

The requirements of the desktop application are as follow:
  1. It must be as isolated as be possible, i.e., it must not depend on the user JRE.
  2. It must be easy to install.
  3. It must be invoked from a web application, i.e, from a web browser.
  4. It must be easily upgradeable.

In this post I´ll explain how to convert a desktop java application in a exe file for windows, and how
to put a embedded JRE inside of it.

All java app needs a Java Runtime Environment in which it´s executed. JRE is a free software you can download from Oracle site and it is used to execute java applications, i.e, jars. But one user only can have one default JRE, and this might not be the last release or might not be the one you need.
In this cases there are two solutions, the obvious is to force the user to use the JRE you need, which imply upgrade/downgrade to the required version. In much cases this is not a valid option because the new JRE may break other applications.
So the recommended solution is that the application be shipped with its own JRE, and this one will be used only by this app. In order to achieve this we will need two programs:
  1. Launch4j. To put it simple, tis is a exe wrapper. You have a jar file and conver it to a exe file for windows with a specifyc JRE.
  2. Inno Setup. This is a installer builder. You have a exe file and some aditional resources, and you get a new full installer wizard.

Step 1, the desktop app

In this posts I´ll use a very simple app comprised of two files.

Main:
package es.sisifo.desktop;

import java.io.IOException;

public class Main {
 public static void main(String[] args) throws IOException {
  String[] textosAMostrar;
  if (args == null || args.length == 0) {
   textosAMostrar = new String[]{"No se han recibido argumentos"};
  }
  else {
   textosAMostrar = args;
  }
  
  SimpleJFrame simpleJFrame = new SimpleJFrame(textosAMostrar);
  simpleJFrame.setVisible(true);
 }
}

SimpleJFrame:
package es.sisifo.desktop;

import java.awt.GridLayout;
import java.io.IOException;

import javax.swing.JFrame;
import javax.swing.JLabel;

public class SimpleJFrame extends JFrame {
 private static final long serialVersionUID = -1153732581002339155L;

 public SimpleJFrame(String[] textosAMostrar) throws IOException {
  super("Simple App");
  setLayout(new GridLayout(textosAMostrar.length, 1));
  for(int i=0; i<textosAMostrar.length; i++) {
   JLabel texto = new JLabel("Texto " + i + ": " + textosAMostrar[i]);
   add(texto);
  }
  
  setBounds(500, 250, 300, 250);

  setResizable(true);
  setDefaultCloseOperation(JFrame.EXIT_ON_CLOSE);
 }
}

And, of course, the POM.xml
<project xmlns="http://maven.apache.org/POM/4.0.0" xmlns:xsi="http://www.w3.org/2001/XMLSchema-instance"
 xsi:schemaLocation="http://maven.apache.org/POM/4.0.0 http://maven.apache.org/xsd/maven-4.0.0.xsd">
 <modelVersion>4.0.0</modelVersion>
 <groupId>es.sisifo</groupId>
 <artifactId>desktop-1</artifactId>
 <version>0.0.1-SNAPSHOT</version>

 <build>
  <plugins>
   <plugin>
    <groupId>org.apache.maven.plugins</groupId>
    <artifactId>maven-compiler-plugin</artifactId>
    <version>3.3</version>
    <configuration>
     <source>1.8</source>
     <target>1.8</target>
    </configuration>
   </plugin>


   <plugin>
    <groupId>org.apache.maven.plugins</groupId>
    <artifactId>maven-assembly-plugin</artifactId>
    <version>2.6</version>
    <executions>
     <execution>
      <id>make-assembly</id>
      <phase>package</phase>
      <goals>
       <goal>single</goal>
      </goals>
      <configuration>
       <archive>
        <manifest>
         <mainClass>es.sisifo.desktop.Main</mainClass>
        </manifest>
        <manifestEntries>
         <Permissions>all-permissions</Permissions>
         <Application-Name>Example Desktop app</Application-Name>        
         <Built-By>Sisifo</Built-By>
        </manifestEntries>
       </archive>
       <descriptorRefs>
        <descriptorRef>jar-with-dependencies</descriptorRef>
       </descriptorRefs>
      </configuration>
     </execution>
    </executions>
   </plugin>
  </plugins>
 </build>
</project>

This app just receives a list of arguments a prints them in  JFrame.
In the pom.xml file, you specify to build the whole app in a single jar and that the main class (i.e. the default entry point) is es.sisifo.desktop.Main.

Step 2, build the exe

You need to download Launch4j. This is a standalone app.

There are a lot of configuration options to create your exe, but in this case we will need just to specify three things:
  1. The output exe file. This will be the exe generated by this program.
  2. The input jar. This is the desktop app created in step one.
  3. The JRE path. This is the bundled JRE the app will use to run.

The important part here is the JRE path. The app must not depend on the user JRE, so it will carry its own JRE. In this case I downloaded the 32 bits JRE from oracle and unzziped it in a bin folder.
I chose to use a 32 bits JRE because I don´t know if the final users will have a 64 bits system.

This is my folder structure:
  • work folder (any folder)
    • bin
      • jre1.8.0_66 (the JRE folder)
      • desktop-1-0.0.1-SNAPSHOT-jar-with-dependencies.jar (the app jar)


Note that the "Bundled JRE path", it is a relative path. You can not set an absolute path here, because you don´t know where the JRE will be in the final user PC.

Finally, you save your configuration file (I named it as "desktop.xml") and you build the exe by clicking in the gear icon.


Ok, now you have a exe file which launch your java app. But if you want to distribute this program as is, you have to ship the the exe file, the jar file and the JRE folder too. The final user will have to create a work folder, anywhere she wish, but this folder must have the structure presented previously, otherwise the exe will not found the jar or the JRE. Cumbersome.

Step 3, build the installer

Lets make the user life more ease and create a windows installer. You need to download Inno Setup.

Inno Setup is configured upon a script file. You can write your script manually, but it has a very useful script wizard, so you will not need to write any code.

Before we start with the installer, you need to reorganize your work folder. You need to create a new folder, for example resources, and put the JRE and the jar inside it. The result is as follow:
  • work folder (any folder)
    • resources
      • bin
        • jre1.8.0_66 (the JRE folder)
        • desktop-1-0.0.1-SNAPSHOT-jar-with-dependencies.jar (the app jar)
    • desktopApp.exe
As you can see next, you need a resources folder in order Inno Setup take all its content and package it inside the installer.


Now, Inno Setup. The first time you run Inno Setup you will see a screen to create your own script or build one from the wizard, In this case we will use the last one.

The wizard is quite simple, so most of the time you can press next without any further configuration.

The result is a classical exe installer placed in a output folder. When you run this installer a wizard will be launched with the options you configured previously. The result is a the new app installed in your system.


At this point you have a distributable installer of about 40 MB that you can send to any windows user, and you can be sure your app will work on its PC.


In the next post I will show how to make this application is launched from a web browser.

domingo, 29 de noviembre de 2015

JBoss EAP 6.2 Domain - HornetQ Cluster - Configure ConnectionFactory

I need that a standalone client app send messages to a queue in a JBoss EAP 6.X domain. This domain have multiple nodes and, if one of those nodes crash, the client could keep sending messages to the others.

I will try to dig a little deeper in the future, but for now, this is the change I made in the Remote Connection Factory configuration.

<connection-factory name="RemoteConnectionFactory">   
 <discovery-group-ref discovery-group-name="dg-group1"/>
 <entries>
  <entry name="java:jboss/exported/jms/RemoteConnectionFactory"/>
 </entries>
 <ha>true</ha>
 <block-on-acknowledge>true</block-on-acknowledge>
 <retry-interval>1000</retry-interval>
 <retry-interval-multiplier>1.0</retry-interval-multiplier>
 <reconnect-attempts>-1</reconnect-attempts>
</connection-factory>

The key is to reference the discovery group instead the connector.

And here the CLI:
/subsystem=messaging/hornetq-server=default/connection-factory=RemoteConnectionFactory:add(discovery-group-name=dg-group1, entries= ["java:jboss/exported/jms/RemoteConnectionFactory"], ha=true, block-on-acknowledge=true, retry-interval=1000, retry-interval-multiplier=1.0, reconnect-attempts=-1)

Java Web Start - Found unsigned entry in resource

When you launch a Java Web Start application via JNLP file (check here https://java.com/en/download/faq/java_webstart.xml) there are a lot of security issues you have to keep in mind. Among them is the fact that your jar must be signed in order to Java allow it to be executed.

If your jar is not signed you will get some message like this:
com.sun.deploy.net.JARSigningException: Se ha encontrado una entrada sin firma en el recurso: https://desarr.local/jnlp/XXXXXXX-jar-with-dependencies.jar


I built my jar by using Maven, and the final output is a file called XXXX-0.0.1-SNAPSHOT-jar-with-dependencies.jar. This jar contains all third party classes and resources that my application need to work.
<plugin>
 <groupId>org.apache.maven.plugins</groupId>
 <artifactId>maven-assembly-plugin</artifactId>
 <version>2.6</version>
 <executions>
  <execution>
   <id>make-assembly</id>
   <phase>package</phase>
   <goals>
    <goal>single</goal>
   </goals>
   <configuration>
    <archive>
     <manifest>
      <mainClass>xxxxxxxxxx.Main</mainClass>
     </manifest>
     <manifestEntries>
      <Permissions>all-permissions</Permissions>
      <Codebase>desarr.local</Codebase>
      <Application-Name>xxxxxxxxx</Application-Name>
      <Application-Library-Allowable-Codebase>https://desarr.local</Application-Library-Allowable-Codebase>
      <Entry-Point>xxxxxxxxxx.Main</Entry-Point>
      <Built-By>Sisifo</Built-By>
     </manifestEntries>
    </archive>
    <descriptorRefs>
     <descriptorRef>jar-with-dependencies</descriptorRef>
    </descriptorRefs>
   </configuration>
  </execution>
 </executions>
</plugin>

Note. 
  • I hid the application name on purpose because it is a real application I am working with.
  • I downloaded the application from a Apache server located in "desarr.local", i.e, this is my htdocs basedir.

So I just needed to sign a jar. Fine, no more than five minutes, thats very easy with jarsigner tool (check here https://docs.oracle.com/javase/7/docs/technotes/tools/windows/jarsigner.html).


To sign my jar I created a self-signed certificate acting as a CA, and with it, I signed a second certificate (kind pro eh).
So, I have a PKCS12 certificate called jar-signer signed with my CA:
  • The file is "jar_signer(1234).p12"
  • The file format is PKCS12
  • The password file is "1234"
  • The certificate alias is "jar-signer"
  • The alias key is "1234"


With this I now could sign my jar:
"c:\Program Files\Java\jdk1.7.0_21\bin\jarsigner.exe" -keystore jar_signer(1234).p12 -storetype PKCS12 -storepass 1234 -keypass 1234 XXXX-SNAPSHOT-jar-with-dependencies.jar jar-signer

Ok, I have a signed jar. I launch my JNLP file again and... Fail. I still get the exact same error.
The jar was signed properly. By using the "-verify" option of jarsigner I got success verification (although with some warnings), but the jar was fine.
"c:\Program Files\Java\jdk1.7.0_21\bin\jarsigner.exe" -verify XXXX-0.0.1-SNAPSHOT-jar-with-dependencies.jar
jar verified.

Warning:
This jar contains entries whose certificate chain is not validated.

Re-run with the -verbose and -certs options for more details.

At this point I checked the following issues:
1) My self signed certificates were not suitable.
I passed the jar to our client and they signed it with a "true" certificate,.
Result: Fail.

2) There were problems with the jarsigner tool.
I signed the jar with the jarsigner shipped with JDK 1.6.0_45, 1.7.0_21 and 1.8.0_51.
Result: Fail

3) Set to checked the java option to "keep temporary files on my computer"
In Control Panel > Java > General > Temporary files > Configuration.
Result: Fail

4) Import the sign certificate and the CA as trusted for java.
In Control Panel > Java > Security > Manage Certificates > User
Result: Fail

So I was quite sure that my configuration was fine and that the problem should be in the dam jar.

I opened the jar and I saw that there were a lot of non essential files in it, like licenses, poms, READMEs, etc...


I decided to manually remove all this "crap" and sign again. The result... Success!!!

After a while doing try-error deletes I found that the real problem was related to the file called "\jboss-as-jms-client-bom-7.3.0.Final-redhat-14.pom". Check the previous image and you will note that there is a slash "\" in this name. I think that, for some unknown reason, the java launcher was not able to process properly that file or that this file was not well signed at all.


Well, once I found the root of the problem, the next step was to modify the procedure I was using to create the jar.

The maven-assembly-plugin (check here http://maven.apache.org/plugins/maven-assembly-plugin/) has a config option called "descriptors" to reference an external descriptor file. Based on this file, the plugin know how to build the jar.
There are four predefined descriptors, being jar-with-dependencies just one of them.

I changed the plugin configuration and created a custom descriptor.
<plugin>
 <groupId>org.apache.maven.plugins</groupId>
 <artifactId>maven-assembly-plugin</artifactId>
 <version>2.6</version>
 <executions>
  <execution>
   <id>make-assembly</id>
   <phase>package</phase>
   <goals>
    <goal>single</goal>
   </goals>
   <configuration>
    <archive>
     <manifest>
      <mainClass>xxxxxxxxxx.Main</mainClass>
     </manifest>
     <manifestEntries>
      <Permissions>all-permissions</Permissions>
      <Codebase>desarr.local</Codebase>
      <Application-Name>xxxxxxxxxx</Application-Name>
      <Application-Library-Allowable-Codebase>https://desarr.local</Application-Library-Allowable-Codebase>
      <Entry-Point>xxxxxxxxxx.Main</Entry-Point>
      <Built-By>Sisifo</Built-By>
     </manifestEntries>
    </archive>
    <descriptors>
     <descriptor>src/dev/assembly/distribution.xml</descriptor>
    </descriptors>
   </configuration>
  </execution>
 </executions>
</plugin>

And this is my distribution.xml file:
<assembly
 xmlns="http://maven.apache.org/plugins/maven-assembly-plugin/assembly/1.1.3"
 xmlns:xsi="http://www.w3.org/2001/XMLSchema-instance"
 xsi:schemaLocation="http://maven.apache.org/plugins/maven-assembly-plugin/assembly/1.1.3 http://maven.apache.org/xsd/assembly-1.1.3.xsd">
 <id>jar-with-dependencies</id>
 <formats>
  <format>jar</format>
 </formats>
 <includeBaseDirectory>false</includeBaseDirectory>
 <dependencySets>
  <dependencySet>
   <outputDirectory>/</outputDirectory>
   <useProjectArtifact>true</useProjectArtifact>
   <unpack>true</unpack>
   <scope>runtime</scope>
   <unpackOptions>
    <excludes>
     <exclude>**/README</exclude>
     <exclude>**/LICENSE</exclude>
     <exclude>**/NOTICE</exclude>
     <exclude>**/ASL2.0</exclude>
     <exclude>**/INDEX.LIST</exclude>
     <exclude>**/*.txt</exclude>
     <exclude>**/*.html</exclude>
     <exclude>**/.project</exclude>
     <exclude>**/.classpath</exclude>
     <exclude>jboss-as-checkstyle/*</exclude>
     <!-- Eclsuiones relacionadas con maven -->     
     <exclude>META-INF/maven/**</exclude>
     <exclude>**/pom.xml</exclude>
     <exclude>**/pom.properties</exclude>
     <exclude>*.pom</exclude>
     <exclude>**/*.pom</exclude>
     <!-- Licencias -->
     <exclude>META-INF/licenses/*</exclude>
     <exclude>licenses/*</exclude>
     
          
     <exclude>%regex[jboss-as-jms-client-bom]</exclude>
     <exclude>\jboss-as-jms-client-bom-7.3.0.Final-redhat-14.pom</exclude>
    </excludes>
   </unpackOptions>
  </dependencySet>
 </dependencySets>

With this configuration what I was trying to do was to remove all non-essential files and, specifically, the jboss-as-jms-client-bom-7.3.0.Final-redhat-14.pom.
Result: Fail
Even doing so, this file was still there. I tried all kind of expressions, excludes, fieldsets, etc... but no luck.


So, the plan B was to use a ant task to open the jar file, remove the file, and repack it.
For this I used maven-antrun-plugin.
<plugin>
 <groupId>org.apache.maven.plugins</groupId>
 <artifactId>maven-antrun-plugin</artifactId>
 <version>1.7</version>
 <executions>
  <execution>
   <id>elimina-bom</id>
   <phase>package</phase>
   <goals>
    <goal>run</goal>
   </goals>
   <configuration>
    <tasks>        
     <zip file="${project.build.directory}/${project.build.finalName}-limpio.jar">
      <zipfileset src="${project.build.directory}/${project.build.finalName}-jar-with-dependencies.jar">
       <exclude name="**/*.pom" />
      </zipfileset>          
     </zip>
    </tasks>
   </configuration>
  </execution>
 </executions>
</plugin>

Finally, after long hours of failures, my JNLP app was working...

domingo, 8 de noviembre de 2015

Externalize log4j configuration file in webapp with spring config property

In a previous post (Externalize log4j configuration file in webapp) I explained how to externalize log4j.xml file by using org.springframework.util.Log4jConfigurer inside web.xml. This solution has a drawback, and it's that you need to use a system property wich points to the external file.

In most cases it is more suitable to have a property inside a config file, just like the rest o properties used in the app. This is accomplished with org.springframework.beans.factory.config.MethodInvokingFactoryBean. This class is able to invoke a method of another class, i.e, Log4jConfigurer and you can do it after your config file would be loaded.

The complete solution would be as follow:
<context:property-placeholder properties-ref="properties" order="1" />
<bean id="properties"  class="org.springframework.beans.factory.config.PropertiesFactoryBean">
 <property name="locations">
  <list>
   <value>classpath:conf.properties</value>
  </list>
 </property>
</bean>


<bean id="log4jInitializer" class="org.springframework.beans.factory.config.MethodInvokingFactoryBean" depends-on="properties">
 <property name="targetClass" value="org.springframework.util.Log4jConfigurer" />
 <property name="targetMethod" value="initLogging" />
 <property name="arguments">
  <list>
   <value>${customProperty.log4j.location:classpath:log4j.xml}</value>   
  </list>
 </property>
</bean>

Java - Maven - Auto generate setter code for transformers class

I´ve been working with multi layered web applications for the last six years, and one thing I learned is that isolation is a fundamental concept. Each layer should only work with its own objects and should only know about objects of immediate next layer.
This is done by using DTOs (Data Transfer Objects) and transformers classes which convert between them. Usually the objects would have the same fields in different layers, over all if you are starting a project from scratch.

For example, suppose you have a class called UsuarioEntity in your Persistence Layer and a class Called Usuario in your Business Layer.
@Entity
@Table(name="USUARIO")
public class UsuarioEntity {
 @Id @GeneratedValue
 private Long id;

 private String nombre;

 private String nif;

 private String login;

 private String password;

 private Date fechaRegistro;

 private Boolean estaActivo;

 @ManyToOne(fetch=FetchType.EAGER)
 @JoinColumn(name="idTipo")
 private TipoUsuarioEntity tipo = new TipoUsuarioEntity();

(...)
}

public class Usuario {
 private Long id;
 private String nombre;
 private String nif;
 private String login;
 private String password;
 private Date fechaRegistro;
 private Boolean estaActivo;
 private TipoUsuario tipo = new TipoUsuario();

(...)
}

The class responsible for transform between UsuarioEntity and Usuario would receive a object UsuarioEntity and would return a object Usuario.

One option could be use Apache Commons BeanUtils.copyProperties (https://commons.apache.org/proper/commons-beanutils/javadocs/v1.8.3/apidocs/index.html) but I don't  like much because errors appear in runtime. If you change some property in Usuario, you would not notice until run the program.

So I prefer to use the setter/getter option, which leads to code like this:
public Usuario usuarioEntity2Usuario(UsuarioEntity usuarioEntity) {
 Usuario usuario = new Usuario();
 
 //bored setter and getter here
  
 return usuario;
}

But this is a tedious task, more tedious the more classes you have.
What I made was a java snippet that, by reflection, generates thesesetters using one of the classes involved. This is valid only when both classes are quite similar.
public class SetterGetterGeneratorServiceImpl implements SetterGetterGeneratorService {

    @Override
    public String generateSetters(final Class<?> clazz, final String objectSet, final String objectGet) {
        final StringBuilder codigoJava = new StringBuilder();

        for (final Method method : clazz.getDeclaredMethods()) {
            if (method.getName().startsWith("set")) {
                codigoJava.append(objectSet).append(".").append(method.getName()).append("(").append(objectGet)
                        .append(".").append(convertSetEnGet(method.getName())).append("()").append(");\n");
            }
        }

        return codigoJava.toString();
    }


    private String convertSetEnGet(final String methodSetName) {
        return "get" + methodSetName.substring(3);
    }
}

When you call this method with your object class, the name of the object to make the setter and the name of the object to make de getter, you "almost" get the java code you need for your transformer.
codigo = setterGetterGeneratorService.generateSetters(Usuario.class, "usuario", "usuarioEntity");

usuario.setId(usuarioEntity.getId());
usuario.setPassword(usuarioEntity.getPassword());
usuario.setEstaActivo(usuarioEntity.getEstaActivo());
usuario.setFechaRegistro(usuarioEntity.getFechaRegistro());
usuario.setNombre(usuarioEntity.getNombre());
usuario.setNif(usuarioEntity.getNif());
usuario.setLogin(usuarioEntity.getLogin());
//usuario.setTipo(usuarioEntity.getTipo());


Going one step further, I put this code in a Maven plugin so you can invoke it from command line. The  project is in GitHub: https://github.com/evazquezma/maven.

To use this Plugin, you need to configure it in the pom file, and set the dependencies with your project classes, so it will can access your entity and business classes.
<build>
 <plugins>
  <plugin>
   <groupId>es.sisifo.plugins</groupId>
   <artifactId>code-generator</artifactId>
   <version>0.0.1-SNAPSHOT</version>
   <dependencies>
    <dependency>
     <groupId>(...)</groupId>
     <artifactId>(...)</artifactId>
     <version>(...)</version>
    </dependency>    
   </dependencies>
  </plugin>
 </plugins>
</build>

To launch de plugin just:
mvn code-generator:setter-getter -DclassName=xxxxxx.Usuario -DobjectSet=usuario -DobjectGet=usuarioEntity

miércoles, 4 de noviembre de 2015

Open SQL Server trace files - RML Utilities

In SQL Server, trace files are generated by SQL Server Profiler.
Microsoft SQL Server Profiler is a graphical user interface to SQL Trace for monitoring an instance of the Database Engine or Analysis Services. You can capture and save data about each event to a file or table to analyze later. For example, you can monitor a production environment to see which stored procedures are affecting performance by executing too slowly. 
Recently we ran with some issues with a web application which uses SQL Server as database. In order to try to analyze what was happening we received a TRC or Trace file, which was generated during a test.

My first try to open this kind of files was ClearTrace, but after a while I was not able to get much insight about the file. The program works fine and you can check some bulk information, but I needed a more fine grain.

Finally I found RML Utilities for SQL Server (RML stands for Replay Markup Language):
The RML utilities allow you to process SQL Server trace files and view reports showing how SQL Server is performing. For example, you can quickly see:
  • Which application, database or login is using the most resources, and which queries are responsible for that
  • Whether there were any plan changes for a batch during the time when the trace was captured and how each of those plans performed
  • What queries are running slower in today's data compared to a previous set of data
When you install RML Utilities (from here), you install several tools (extracted from RML Help):
ReadTrace
ReadTrace consumes as input trace (.TRC) or (.XEL)files and .CAB or .ZIP files which contain .TRC files. The outputs from ReadTrace can be .TRC files, .RML files and the Performance Analysis (PerfAnalysis) database. (A populated performance analysis database is required for Reporter functionality.)
Reporter
Reporter is a .NET based application used for visualizing the trace data loaded by ReadTrace. Reporter displays Reporting Services based report (.rdlc) files by using the client Report Viewer control. A Reporting Services installation is not required. . The report-based infrastructure allows for interactive analysis that was not possible using the static .HTM output from prior versions.
Reporter is compiled for native use on ANY platform. When you review large data sets it is helpful to use larger 64 bit computers.
Ostress
    OStress is a scalable, ODBC based application which can stress or replay database commands. In stress mode you can specify a query via a command line parameter, .SQL script or .RML file. Replay mode uses .RML files generated by ReadTrace as it processes SQL Server trace files.
    ORCA
    OStress Replay Control Agent (ORCA.exe) is a singleton COM object that provides session tracking, sequencing, delta timing and DTC transactional control for OStress replay. 
    OStress handles the ORCA object creation and configuration unless you are performing a multiple instance replay.


    In this case, to open trace files, you only need ReadTrace and Reporter. ReadTrace parses the TRC file and "moves" it into a SQL Server Database called PerfAnalysis (it's can be configured). Then, Reporter opens this Database, interprets this information, and shows it in a user friendly way.

    So, starting with the TRC file, you have to execute de following command:
    ReadTrace -ImySQLTrace.trc -omyOutputDir
    

    I just needed specify the input file and the output dir because in my PC there is already a SQL Server installed. ReadTrace will use windows auntenthicantion to connect to it and it will create the PerfAnalysis database.

    Once executed, Reporter will open automatically. If dont, you can start it manually.


    I leave the funny part, interpret the data, for future posts :)

    domingo, 1 de noviembre de 2015

    org.hsqldb.HsqlException: data exception: string data, right truncation

    This exception appear when you try to populate a database with DBUNIT, and there is one text field which content bigger than the column size. (I spent almost 30 minutes until I realized it...)

    The solution is to increase the column size in the entity mapping.

    As you can see, I had a column named T_EXPED with length 2, and I tried to put in it a string with lenght 3.

    Entity mapping:
    @Entity
    @Table(name="INDDO")
    public class Inddo {
     (...)
     
     @Column(name="T_EXPED", columnDefinition="char(2)")
     private String tipoExpediente;
     
     (...)
    }
    

    DBUNIT file:
    <?xml version='1.0' encoding='UTF-8'?>
    <dataset>
     <INDDO (...) T_EXPED="22I" (...) />
    </dataset>
    

    Full exception trace:
    org.dbunit.DatabaseUnitException: Exception processing table name='INDDO'
     at org.dbunit.operation.RefreshOperation.execute(RefreshOperation.java:130)
     at es.cixtec.entradadocumentos.persistencia.facade.TestIndiceFacade.setup(TestIndiceFacade.java:69)
     at sun.reflect.NativeMethodAccessorImpl.invoke0(Native Method)
     at sun.reflect.NativeMethodAccessorImpl.invoke(NativeMethodAccessorImpl.java:57)
     at sun.reflect.DelegatingMethodAccessorImpl.invoke(DelegatingMethodAccessorImpl.java:43)
     at java.lang.reflect.Method.invoke(Method.java:601)
     at org.junit.runners.model.FrameworkMethod$1.runReflectiveCall(FrameworkMethod.java:47)
     at org.junit.internal.runners.model.ReflectiveCallable.run(ReflectiveCallable.java:12)
     at org.junit.runners.model.FrameworkMethod.invokeExplosively(FrameworkMethod.java:44)
     at org.junit.internal.runners.statements.RunBefores.evaluate(RunBefores.java:24)
     at org.springframework.test.context.junit4.statements.RunBeforeTestMethodCallbacks.evaluate(RunBeforeTestMethodCallbacks.java:74)
     at org.junit.internal.runners.statements.RunAfters.evaluate(RunAfters.java:27)
     at org.springframework.test.context.junit4.statements.RunAfterTestMethodCallbacks.evaluate(RunAfterTestMethodCallbacks.java:83)
     at org.springframework.test.context.junit4.statements.SpringRepeat.evaluate(SpringRepeat.java:72)
     at org.springframework.test.context.junit4.SpringJUnit4ClassRunner.runChild(SpringJUnit4ClassRunner.java:231)
     at org.springframework.test.context.junit4.SpringJUnit4ClassRunner.runChild(SpringJUnit4ClassRunner.java:88)
     at org.junit.runners.ParentRunner$3.run(ParentRunner.java:238)
     at org.junit.runners.ParentRunner$1.schedule(ParentRunner.java:63)
     at org.junit.runners.ParentRunner.runChildren(ParentRunner.java:236)
     at org.junit.runners.ParentRunner.access$000(ParentRunner.java:53)
     at org.junit.runners.ParentRunner$2.evaluate(ParentRunner.java:229)
     at org.springframework.test.context.junit4.statements.RunBeforeTestClassCallbacks.evaluate(RunBeforeTestClassCallbacks.java:61)
     at org.springframework.test.context.junit4.statements.RunAfterTestClassCallbacks.evaluate(RunAfterTestClassCallbacks.java:71)
     at org.junit.runners.ParentRunner.run(ParentRunner.java:309)
     at org.springframework.test.context.junit4.SpringJUnit4ClassRunner.run(SpringJUnit4ClassRunner.java:174)
     at org.eclipse.jdt.internal.junit4.runner.JUnit4TestReference.run(JUnit4TestReference.java:50)
     at org.eclipse.jdt.internal.junit.runner.TestExecution.run(TestExecution.java:38)
     at org.eclipse.jdt.internal.junit.runner.RemoteTestRunner.runTests(RemoteTestRunner.java:459)
     at org.eclipse.jdt.internal.junit.runner.RemoteTestRunner.runTests(RemoteTestRunner.java:675)
     at org.eclipse.jdt.internal.junit.runner.RemoteTestRunner.run(RemoteTestRunner.java:382)
     at org.eclipse.jdt.internal.junit.runner.RemoteTestRunner.main(RemoteTestRunner.java:192)
    Caused by: java.sql.SQLDataException: data exception: string data, right truncation
     at org.hsqldb.jdbc.JDBCUtil.sqlException(Unknown Source)
     at org.hsqldb.jdbc.JDBCUtil.sqlException(Unknown Source)
     at org.hsqldb.jdbc.JDBCPreparedStatement.fetchResult(Unknown Source)
     at org.hsqldb.jdbc.JDBCPreparedStatement.execute(Unknown Source)
     at org.dbunit.database.statement.SimplePreparedStatement.addBatch(SimplePreparedStatement.java:80)
     at org.dbunit.operation.RefreshOperation$RowOperation.execute(RefreshOperation.java:192)
     at org.dbunit.operation.RefreshOperation$InsertRowOperation.execute(RefreshOperation.java:258)
     at org.dbunit.operation.RefreshOperation.execute(RefreshOperation.java:115)
     ... 30 more
    Caused by: org.hsqldb.HsqlException: data exception: string data, right truncation
     at org.hsqldb.error.Error.error(Unknown Source)
     at org.hsqldb.error.Error.error(Unknown Source)
     at org.hsqldb.types.CharacterType.castOrConvertToType(Unknown Source)
     at org.hsqldb.types.CharacterType.convertToType(Unknown Source)
     at org.hsqldb.StatementDML.getInsertData(Unknown Source)
     at org.hsqldb.StatementInsert.getResult(Unknown Source)
     at org.hsqldb.StatementDMQL.execute(Unknown Source)
     at org.hsqldb.Session.executeCompiledStatement(Unknown Source)
     at org.hsqldb.Session.execute(Unknown Source)
     ... 36 more
    

    viernes, 30 de octubre de 2015

    UNIX SSHD - Enable Tunnel

    Almost all UNIX distributions have a SSH server preinstalled, and ready to work. One thing I realize recently is that this default configuration does not allow tunnels.

    I have a couple of post explaining how to connect windows machines through a SSH tunnel (http://trabajosdesisifo.blogspot.com.es/2015/08/remote-desktop-with-ssh-tunnel.html and http://trabajosdesisifo.blogspot.com.es/2015/10/vnc-connection-with-ssh-tunnel.html), but in order to work properly in UNIX, you have to make a small tweak first.


    Edit /etc/ssh/sshd_config file and set the following parameter:
    GatewayPorts clientspecified


    Then, just restart the service:
    service sshd restart


    This is my full sshd_config file:
    # $OpenBSD: sshd_config,v 1.80 2008/07/02 02:24:18 djm Exp $
    
    # This is the sshd server system-wide configuration file.  See
    # sshd_config(5) for more information.
    
    # This sshd was compiled with PATH=/usr/local/bin:/bin:/usr/bin
    
    # The strategy used for options in the default sshd_config shipped with
    # OpenSSH is to specify options with their default value where
    # possible, but leave them commented.  Uncommented options change a
    # default value.
    
    #Port 22
    #AddressFamily any
    #ListenAddress 0.0.0.0
    #ListenAddress ::
    
    # Disable legacy (protocol version 1) support in the server for new
    # installations. In future the default will change to require explicit
    # activation of protocol 1
    Protocol 2
    
    # HostKey for protocol version 1
    #HostKey /etc/ssh/ssh_host_key
    # HostKeys for protocol version 2
    #HostKey /etc/ssh/ssh_host_rsa_key
    #HostKey /etc/ssh/ssh_host_dsa_key
    
    # Lifetime and size of ephemeral version 1 server key
    #KeyRegenerationInterval 1h
    #ServerKeyBits 1024
    
    # Logging
    # obsoletes QuietMode and FascistLogging
    #SyslogFacility AUTH
    SyslogFacility AUTHPRIV
    #LogLevel INFO
    
    # Authentication:
    
    #LoginGraceTime 2m
    #PermitRootLogin yes
    #StrictModes yes
    #MaxAuthTries 6
    #MaxSessions 10
    
    #RSAAuthentication yes
    #PubkeyAuthentication yes
    #AuthorizedKeysFile .ssh/authorized_keys
    #AuthorizedKeysCommand none
    #AuthorizedKeysCommandRunAs nobody
    
    # For this to work you will also need host keys in /etc/ssh/ssh_known_hosts
    #RhostsRSAAuthentication no
    # similar for protocol version 2
    #HostbasedAuthentication no
    # Change to yes if you don't trust ~/.ssh/known_hosts for
    # RhostsRSAAuthentication and HostbasedAuthentication
    #IgnoreUserKnownHosts no
    # Don't read the user's ~/.rhosts and ~/.shosts files
    #IgnoreRhosts yes
    
    # To disable tunneled clear text passwords, change to no here!
    #PasswordAuthentication yes
    #PermitEmptyPasswords no
    PasswordAuthentication yes
    
    # Change to no to disable s/key passwords
    #ChallengeResponseAuthentication yes
    ChallengeResponseAuthentication no
    
    # Kerberos options
    #KerberosAuthentication no
    #KerberosOrLocalPasswd yes
    #KerberosTicketCleanup yes
    #KerberosGetAFSToken no
    #KerberosUseKuserok yes
    
    # GSSAPI options
    #GSSAPIAuthentication no
    GSSAPIAuthentication yes
    #GSSAPICleanupCredentials yes
    GSSAPICleanupCredentials yes
    #GSSAPIStrictAcceptorCheck yes
    #GSSAPIKeyExchange no
    
    # Set this to 'yes' to enable PAM authentication, account processing,
    # and session processing. If this is enabled, PAM authentication will
    # be allowed through the ChallengeResponseAuthentication and
    # PasswordAuthentication.  Depending on your PAM configuration,
    # PAM authentication via ChallengeResponseAuthentication may bypass
    # the setting of "PermitRootLogin without-password".
    # If you just want the PAM account and session checks to run without
    # PAM authentication, then enable this but set PasswordAuthentication
    # and ChallengeResponseAuthentication to 'no'.
    #UsePAM no
    UsePAM yes
    
    # Accept locale-related environment variables
    AcceptEnv LANG LC_CTYPE LC_NUMERIC LC_TIME LC_COLLATE LC_MONETARY LC_MESSAGES
    AcceptEnv LC_PAPER LC_NAME LC_ADDRESS LC_TELEPHONE LC_MEASUREMENT
    AcceptEnv LC_IDENTIFICATION LC_ALL LANGUAGE
    AcceptEnv XMODIFIERS
    
    #AllowAgentForwarding yes
    #AllowTcpForwarding yes
    #GatewayPorts no
    GatewayPorts clientspecified
    #X11Forwarding no
    X11Forwarding yes
    #X11DisplayOffset 10
    #X11UseLocalhost yes
    #PrintMotd yes
    #PrintLastLog yes
    #TCPKeepAlive yes
    #UseLogin no
    #UsePrivilegeSeparation yes
    #PermitUserEnvironment no
    #Compression delayed
    #ClientAliveInterval 0
    #ClientAliveCountMax 3
    #ShowPatchLevel no
    #UseDNS yes
    #PidFile /var/run/sshd.pid
    #MaxStartups 10:30:100
    #PermitTunnel no
    #ChrootDirectory none
    
    # no default banner path
    #Banner none
    
    # override default of no subsystems
    Subsystem sftp /usr/libexec/openssh/sftp-server
    
    # Example of overriding settings on a per-user basis
    #Match User anoncvs
    # X11Forwarding no
    # AllowTcpForwarding no
    # ForceCommand cvs server
    

    VNC Connection with SSH Tunnel

    In a previous post I explained how to make a remote desktop connection using a SSH Tunnel. Recently I had to use this solution and I found it did not work with the target machine´s network configuration. Fortunately there Mr V (alias coffee man) was to safe our lives.

    This new solution involve Real VNC and, of course, a SSH Tunnel.

    As you can check in the official site (http://www.realvnc.com/download/):
    VNC enables you to remotely access and control your devices wherever you are in the world, whenever you need to. VNC has a widespread user base — from individuals to the world's largest multi-national companies — utilizing the technology for a range of applications.
    You will need two tools:
    • VNC Server installed in the Target PC
    • VNC Viewer "installed" (there is a portable version) in the Source PC
    Also you will need a third machine, called Gateway, with a SSH Server installed.


    Previous preparation

    I will not explain again how to set up a SSH server in Gateway. In this case, I will use a CentOS machine, so this step is already taken for granted.

    In Target machine you do need to install VNC Server. You can install only the VNC Server and leave the VNC Viewer because in Target PC you will not need it.


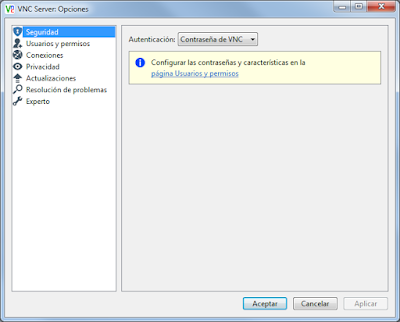
    The installation is quite simple and you can leave all options by default. You only need to set a connection password.


    Once installed, the first time you start the program, it will ask you for a license key. You can get a free non-expired license in the official site.


    The important part of all of this configuration is the port 5900. This is the port in which VNC Server will be listening for incoming connections.

    Tunneling

    There will be just one SSH Tunnels:
    • From Target PC to Gateway
    The topology of the solution is depicted in the following image:


    Tunnel from Target to Gateway

    Working on Target PC, with putty you have to set the following configuration.
    In Session category:
    • Host name and port of the SSH Server of Gateway
    In Connection category:
    • Set the parametter "Seconds beween keepalives" to 180
    In Connection > SSH > Tunnels category:
    • Check "Local ports accept connections from other hosts" option
    • Check "Remote ports do the seame (SSH-2 only)" option
    • Set Source port 9999 (this is a random number), destination localhost:5900 and check the option Remote. Then push "Add"
    Note; If with localhost does not work, try to put the Target PC IP in destination.


    Testing the tunnel

    In order to test de connection, from Source, you need to install VNC Viewer. This is a standalone app (ie, portable).

    In Source PC just open VNC Viewer and set the value of VNC Server as your Gateway direction and port 9999.


    Then you will have to enter the password you set during the VNC Server installation.


    Enjoy.

    domingo, 18 de octubre de 2015

    Virtual Box - CentOS - Shrink VMDK disk

    We start with a bunch of VMDK files and we want to shrink their size. The steps are as follow:
    1) Unlink el VMDK of the virtual machine from VirtualBox

    2) Convert the VMDK to VDI
    "c:\Program Files\Oracle\VirtualBox\VBoxManage.exe" clonehd --format VDI CentOS6.6-base.vmdk Integracion.vdi
    

    3) Link the VDI again to the virtual machine

    4) Nullify the empty space (this example is for CentOS)
    dd if=/dev/zero of=/bigemptyfile bs=4096k
    rm -rf /bigemptyfile
    

    5) Compact the VDI
    "c:\Program Files\Oracle\VirtualBox\VBoxManage.exe" modifyhd Integracion.vdi --compact
    

    6) Convert the VDI to VMDK, and specify the split option
    "c:\Program Files\Oracle\VirtualBox\VBoxManage.exe" clonehd --format VMDK Integracion.vdi Centos-Integracion.vmdk --variant Split2G
    

    7) Link de VMDK to the virtual machie


    Note: VBoxManage is one of the command-line tools which are installed with Virtual Box.

    jueves, 24 de septiembre de 2015

    JBoss Domain - Could not connect to master - Unable to connect due to authentication failure

    Recently I ran in a problem related to a JBoss Domain which spans across two different physical hosts.

    First, I configured a JBoss Domain in just one machine with a Domain Controller (DC) and two Host Controllers (HC). Everything was working fine, so I decided to go one step further and to configure two more HCs in another machine.
    The procedure seemed quite obvious, and I cloned the machine one and just changed networks interfaces in this new machine. The rest of the configurations remained the same, i.e, host.xml in HC, where the secret key was configured in order to connect to DC.

    But this didn't work. When I started the HC in machine 2 I got the following error:
    [root@localhost bin]# ./domain.sh
    =========================================================================
    
      JBoss Bootstrap Environment
    
      JBOSS_HOME: /opt/jboss-eap-6.2-hc1
    
      JAVA: java
    
      JAVA_OPTS: -Xms64m -Xmx512m -XX:MaxPermSize=256m -Djava.net.preferIPv4Stack=true -Djboss.modules.system.pkgs=org.jboss.byteman -Djava.awt.headless=true
    
    =========================================================================
    
    09:23:02,219 INFO  [org.jboss.modules] (main) JBoss Modules version 1.3.0.Final-redhat-2
    09:23:02,432 INFO  [org.jboss.as.process.Host Controller.status] (main) JBAS012017: Starting process 'Host Controller'
    [Host Controller] 09:23:03,382 INFO  [org.jboss.modules] (main) JBoss Modules version 1.3.0.Final-redhat-2
    [Host Controller] 09:23:03,560 INFO  [org.jboss.msc] (main) JBoss MSC version 1.0.4.GA-redhat-1
    [Host Controller] 09:23:03,667 INFO  [org.jboss.as] (MSC service thread 1-1) JBAS015899: JBoss EAP 6.2.0.GA (AS 7.3.0.Final-redhat-14) starting
    [Host Controller] 09:23:04,778 INFO  [org.xnio] (MSC service thread 1-2) XNIO Version 3.0.7.GA-redhat-1
    [Host Controller] 09:23:04,791 INFO  [org.xnio.nio] (MSC service thread 1-2) XNIO NIO Implementation Version 3.0.7.GA-redhat-1
    [Host Controller] 09:23:04,830 INFO  [org.jboss.remoting] (MSC service thread 1-2) JBoss Remoting version 3.2.18.GA-redhat-1
    [Host Controller] 09:23:04,940 INFO  [org.jboss.as.remoting] (MSC service thread 1-2) JBAS017100: Listening on 192.168.56.202:9999
    [Host Controller] 09:23:05,646 ERROR [org.jboss.remoting.remote.connection] (Remoting "localhost.localdomain:MANAGEMENT" read-1) JBREM000200: Remote connection failed: javax.security.sasl.SaslException: Authentication failed: all available authentication mechanisms failed
    [Host Controller] 09:23:05,653 ERROR [org.jboss.as.host.controller] (Controller Boot Thread) JBAS010901: Could not connect to master. Aborting. Error was: java.lang.IllegalStateException: JBAS010942: Unable to connect due to authentication failure.
    [Host Controller] 09:23:05,665 INFO  [org.jboss.as.controller] (MSC service thread 1-2) JBAS014774: Service status report
    [Host Controller] JBAS014775:    New missing/unsatisfied dependencies:
    [Host Controller]       service jboss.server.controller.management.security_realm.ApplicationRealm.properties_authentication (missing) dependents: [service jboss.server.controller.management.security_realm.ApplicationRealm]
    [Host Controller]
    [Host Controller] 09:23:05,692 INFO  [org.jboss.as.controller] (MSC service thread 1-2) JBAS014774: Service status report
    [Host Controller] JBAS014776:    Newly corrected services:
    [Host Controller]       service jboss.server.controller.management.security_realm.ApplicationRealm.properties_authentication (no longer required)
    [Host Controller]
    [Host Controller] 09:23:05,695 INFO  [org.jboss.as] (MSC service thread 1-2) JBAS015950: JBoss EAP 6.2.0.GA (AS 7.3.0.Final-redhat-14) stopped in 27ms
    09:23:06,045 INFO  [org.jboss.as.process.Host Controller.status] (reaper for Host Controller) JBAS012010: Process 'Host Controller' finished with an exit status of 99
    09:23:06,051 INFO  [org.jboss.as.process] (Thread-8) JBAS012016: Shutting down process controller
    09:23:06,052 INFO  [org.jboss.as.process] (Thread-8) JBAS012015: All processes finished; exiting
    

    I don´t know why, but when DC and HC are in the same machine, in the host.xml of HC, you can put any slave name you want. But when DC and HC are in different machines, the slave name must be a management user in DC,

    So what I did was:
    1) Create a management user in HC, for example "adminHostController003".
        You have to launch add-user.sh script y HC server.
        This user will have the following characteristics:
    • Management user (in ManagementRealm)
    • No roles
    • Allow remoting connections
    2) Copy the secret key and edit host.xml in Host Controller JBoss. 
       In this file you have to configure:
    • Host Name. The name of the user created in step 1
    • Server identities. The key asociated to this user.
    • Domain controller location. IP and port of DC
    <host name="adminHostController003" xmlns="urn:jboss:domain:1.5">
    
     <management>
      <security-realms>
       <security-realm name="ManagementRealm">
        <server-identities>
         <secret value="Y2l4dGVjLjIwMTU="/>
        </server-identities>
        <authentication>                  
         <properties path="mgmt-users.properties" relative-to="jboss.domain.config.dir"/>
        </authentication>
        <authorization map-groups-to-roles="false">
         <properties path="mgmt-groups.properties" relative-to="jboss.domain.config.dir"/>
        </authorization>
       </security-realm>
       <security-realm name="ApplicationRealm">
        <authentication>
         <local default-user="$local" allowed-users="*"/>
         <properties path="application-users.properties" relative-to="jboss.domain.config.dir"/>
        </authentication>
        <authorization>
         <properties path="application-roles.properties" relative-to="jboss.domain.config.dir"/>
        </authorization>
       </security-realm>
      </security-realms>
      <audit-log>
       <formatters>
        <json-formatter name="json-formatter"/>
       </formatters>
       <handlers>
        <file-handler name="host-file" formatter="json-formatter" path="audit-log.log" relative-to="jboss.domain.data.dir"/>
        <file-handler name="server-file" formatter="json-formatter" path="audit-log.log" relative-to="jboss.server.data.dir"/>
       </handlers>
       <logger log-boot="true" log-read-only="false" enabled="false">
        <handlers>
         <handler name="host-file"/>
        </handlers>
       </logger>
       <server-logger log-boot="true" log-read-only="false" enabled="false">
        <handlers>
         <handler name="server-file"/>
        </handlers>
       </server-logger>
      </audit-log>
      <management-interfaces>
       <native-interface security-realm="ManagementRealm">
        <socket interface="management" port="${jboss.management.native.port:9999}"/>
       </native-interface>
      </management-interfaces>
     </management>
    
     <domain-controller>
      <remote host="192.168.56.101" port="9999" security-realm="ManagementRealm"/>
     </domain-controller>
    
     <interfaces>
      <interface name="management">
       <inet-address value="${jboss.bind.address.management:192.168.56.202}"/>
      </interface>
      <interface name="public">
       <inet-address value="${jboss.bind.address:192.168.56.202}"/>
      </interface>
      <interface name="unsecure">
       <inet-address value="${jboss.bind.address.unsecure:192.168.56.202}"/>
      </interface>
     </interfaces>
    
     <jvms>
      <jvm name="default">
       <heap size="64m" max-size="256m"/>
       <permgen size="256m" max-size="256m"/>
       <jvm-options>
        <option value="-server"/>
       </jvm-options>
      </jvm>
     </jvms>
    
     <servers>    
     </servers>
    
    </host>

    Note.
    After a while I realized that you can not copy all JBoss installation directory to the other machine (remember, I cloned the machines). This leads to problems with HornetQ because you have several servers in the same network with the same ID.
    This ID is created the first time a node starts and it is stored in some internal dir, so if you copied the whole directory you are also copying the ID.
    In these cases you will see this WARN message:
    12:32:54,418 WARN  [org.hornetq.core.client] (hornetq-discovery-group-thread-dg-group1) HQ212034: There are more than one servers on the network broadcasting the same node id. You will see this message exactly once (per node) if a node is restarted, in which case it can be safely ignored. But if it is logged continuously it means you really do have more than one node on the same network active concurrently with the same node id. This could occur if you have a backup node active at the same time as its live node. nodeID=374ca1fe-61d7-11e5-b4c6-75baa50d332e
    

    sábado, 22 de agosto de 2015

    Remote Desktop with SSH Tunnel

    In this post I will show you how to access to a PC with Windows Remote Desktop. Well, this would be quite easy, so to make it more funny, the target Machine is not accessible from the Source Machine, but do there is a third machine which is accessible from both of them.

    The topology of the problem is depicted in the following image:


    We have these elements:
    • Target PC (windows). This is the machine I want to connect to.
    • Source PC (windows). This is the machine from where I want to connect to the Target PC.
    • Gateway (windows/Unix). This is the intermediary between Source and Target.
    You have to keep in mind these constraints:
    • Source cannot reach Target
    • Source can reach Gateway
    • Target can reach Gateway
    • Gateway cannot reach Target
    So, the idea is to use Gateway as a bridge between Source and Target. To make this happen we will use SSH Tunnels.

    Previous preparation

    In my concrete scenery, Gateway is a Windows Server PC, so I will have to configure SSH Server in it, but if you have a Unix Machine this step is already taken for granted.

    You can use FreeSSHD as SSH Server. It is free (obvious) and very easy to configure. For example you can check this page.
    The basic steps to configure it are:
    1. Install with default options
    2. Run as a service
    3. Configure SSH port, only if 22 were already in use
    4. Configure authentication to require password
    5. Add some user
    Besides, I'll add another step. Enable Tunneling options


    Once you are done, you can check that all works properly by connecting with Putty to this machine. You should see one active user connected:


    Tunneling

    There will be two SSH tunnels: 
    • From Target to Gateway
    • From Source to Gateway
    The topology of the solution is depicted in the following image:


    Target will open a tunnel in which all connections in Gateway to port 9999 will be redirected to itself in port 3389. Port 3389 is the default Windows Remote Desktop port.

    Source will open a tunnel in which all connections in Source to port 13389 will be redirected to Gateway in port 9999.

    Now you should have noted that the bridge is Gateway´s port 9999.

    Tunnel from Target to Gateway

    Working on Target PC, with putty you have to set the following configuration.
    In Session category:
    • Host name and port of the SSH Server of Gateway
    In Connection category:
    • Set the parametter "Seconds beween keepalives" to 180
    In Connection > SSH > Tunnels category:
    • Check "Local ports accept connections from other hosts" option
    • Check "Remote ports do the seame (SSH-2 only)" option
    • Set source port 9999, destination localhost:3389 and check the option Remote. Then push "Add"

    Tunnel from Source to Gateway

    Working on Source PC, with putty you have to set the following configuration.
    In Session category:
    • Host name and port of the SSH Server of Gateway
    In Connection category:
    • Set the parametter "Seconds beween keepalives" to 180
    In Connection > SSH > Tunnels category:
    • Check "Local ports accept connections from other hosts" option
    • Check "Remote ports do the seame (SSH-2 only)" option
    • Set source port 13389, destination 192.168.65.133:9999 and check the option Local. Then push "Add"

    Testing the tunnel

    From Source, you only need to try to connect with remote desktop to localhost:13389. The connection will travel throught the first tunnel to Gateway, and from Gateway to Target throught the other tunnel.


    Thanks to Mr V (alias coffee man) for helping me with this.


    Bonus

    In Target, you can configure a script to use Putty Command Line options to connect automatically.
    In my example I named my session as "Tunel a Gateway", but for command line is better to set a one-word name, for example gatewayTunnel.

    putty.exe -load gatewayTunnel -l userName -pw password